Ran out of Australian data? Add a RoamMelb eSIM in 5 minutes
I work at RoamMelb. In this post I install our eSIM on my own iPhone, step by step, so you can see exactly what to tap, and the one setting people most often miss.
Who is this for?
Scenario 1: top up when your Australian data runs out.
Keep your current plan and number (ALDI Mobile, Optus, Telstra and so on). When the monthly data runs out, add a RoamMelb eSIM and use it for mobile data. Calls and texts still come in on your original number.
Scenario 2: a simple data line for kids and grandparents.
Children and older relatives often use very little data: they are on Wi-Fi at home and only need to send a few messages when they are out. Keep their main SIM (for example ALDI Mobile) just to hold the phone number, and add a RoamMelb eSIM to cover data when they leave the house.
The whole thing takes about 5 minutes. Please find a place with stable Wi-Fi first.
Step 1: Add the eSIM
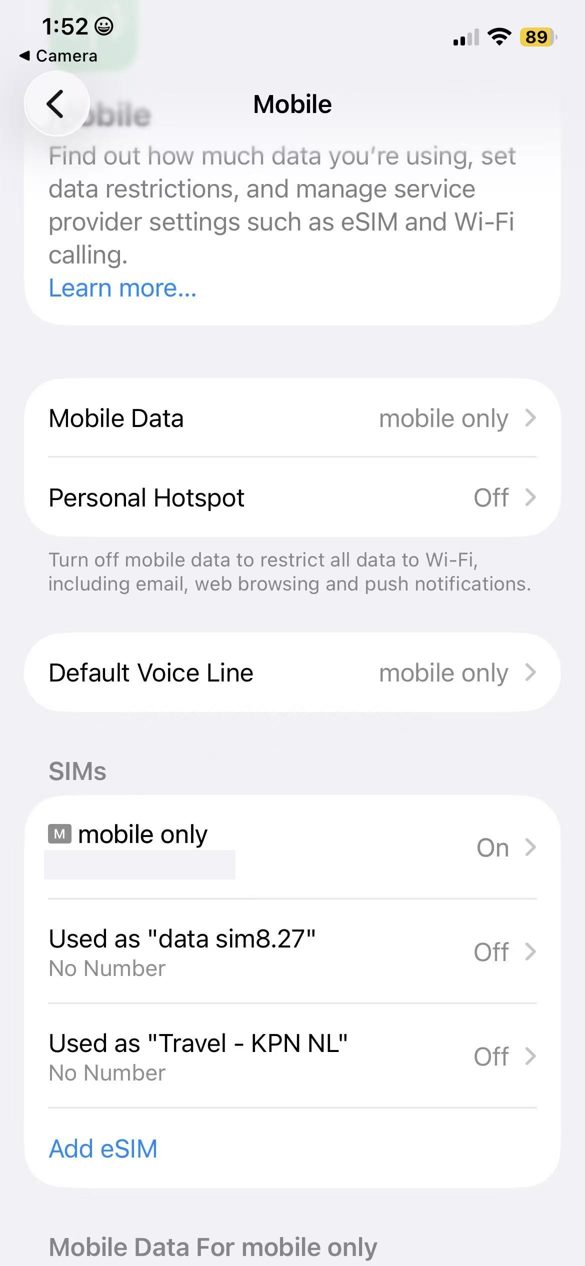
Either scan the QR code from your order with the iPhone camera, or go to Settings > Mobile and tap Add eSIM.
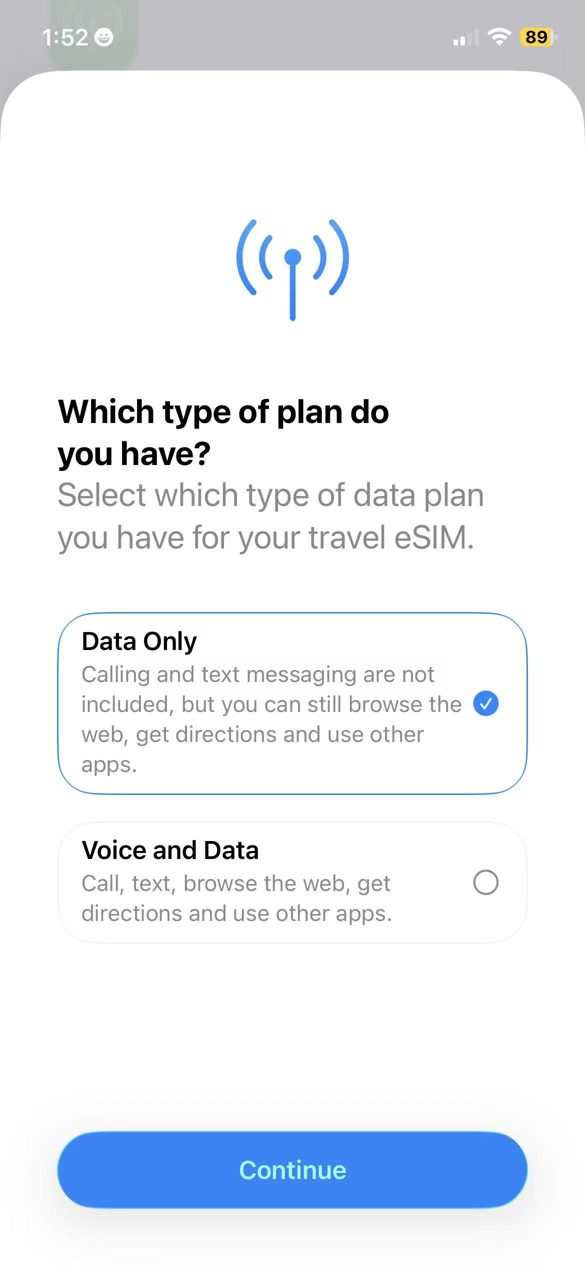
Step 2: Choose “Data Only”
iPhone asks which type of plan you have. Select Data Only and tap Continue. RoamMelb cards are data-only.
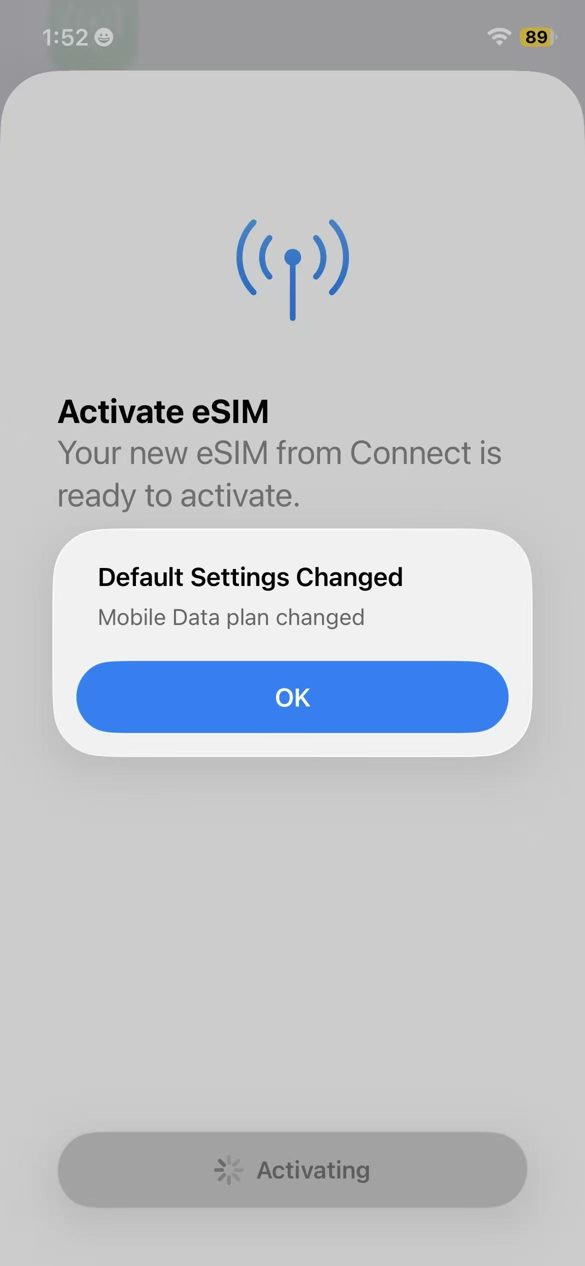
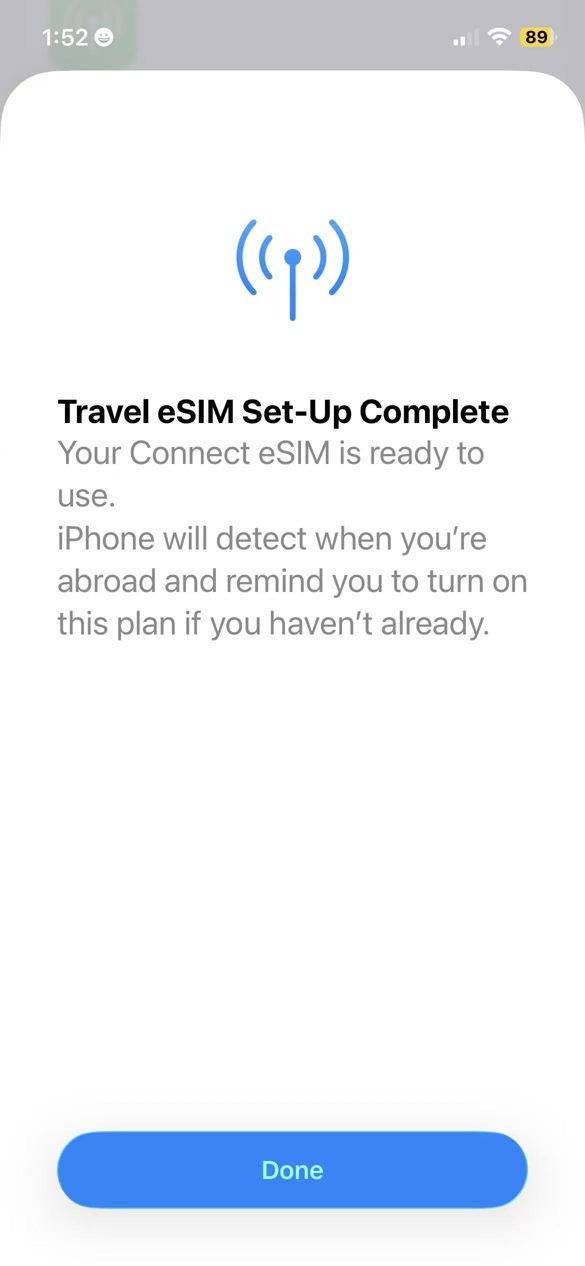
Step 3: Wait for activation (keep Wi-Fi on)
Installation is automatic and takes a few seconds. Stay on stable Wi-Fi and do not leave the screen. If you see “Default Settings Changed: Mobile Data plan changed”, tap OK: iPhone has simply switched mobile data to the new eSIM. When you see “Travel eSIM Set-Up Complete”, tap Done.
Step 4: Rename the card to its install date
A handy tip: rename the eSIM to the date you installed it (mine is “Travel - KPN NL 10.4”, installed on 4 Oct). Then you always know when the plan started and roughly when it will run out.
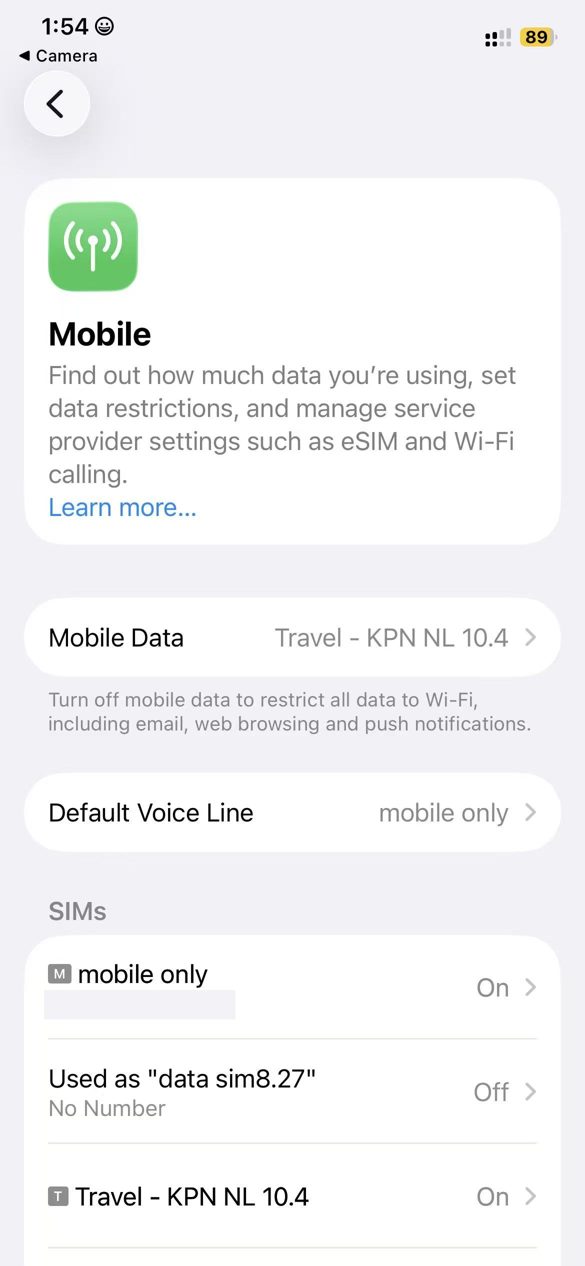
Notice that Default Voice Line is still your original SIM, so calls and texts do not change.
Step 5: Reset statistics
Scroll to the bottom of Settings > Mobile and tap Reset Statistics. From then on you can see how much data you have used.
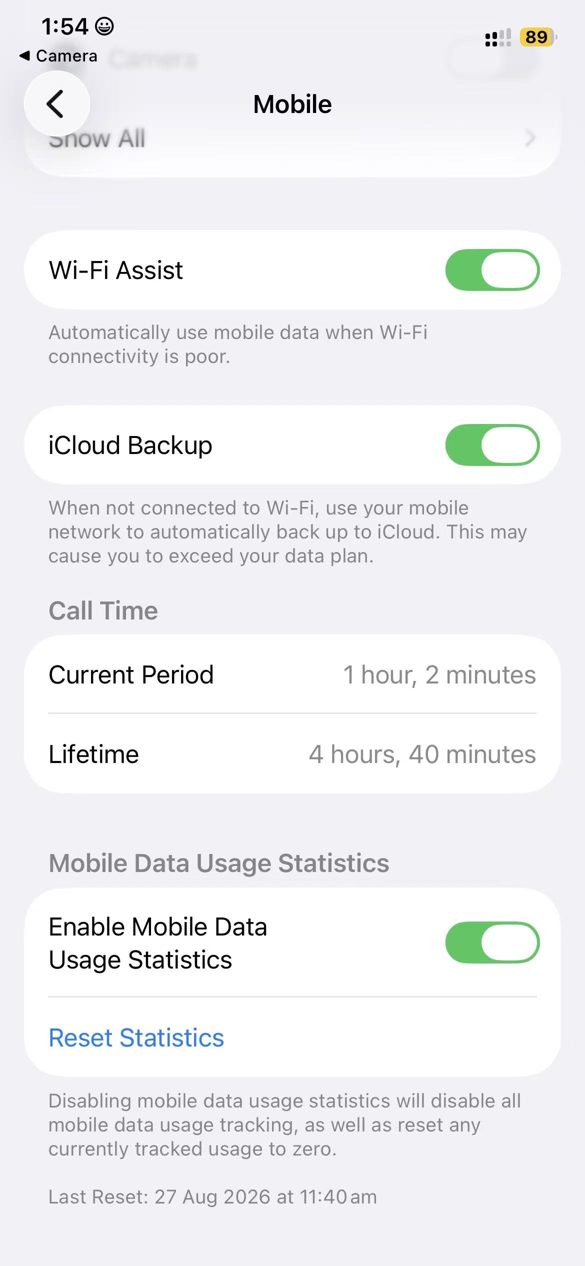
Step 6: Turn on Data Roaming (important!)
Data Roaming is off by default on a new eSIM. Open the RoamMelb eSIM and switch it on, otherwise the card will not connect.
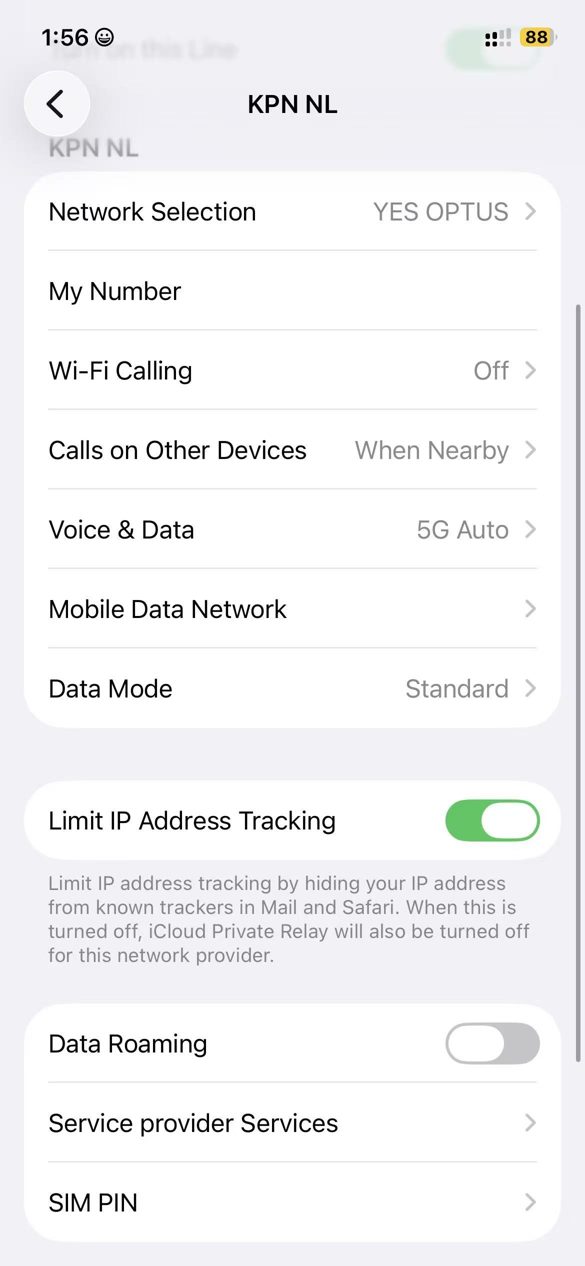
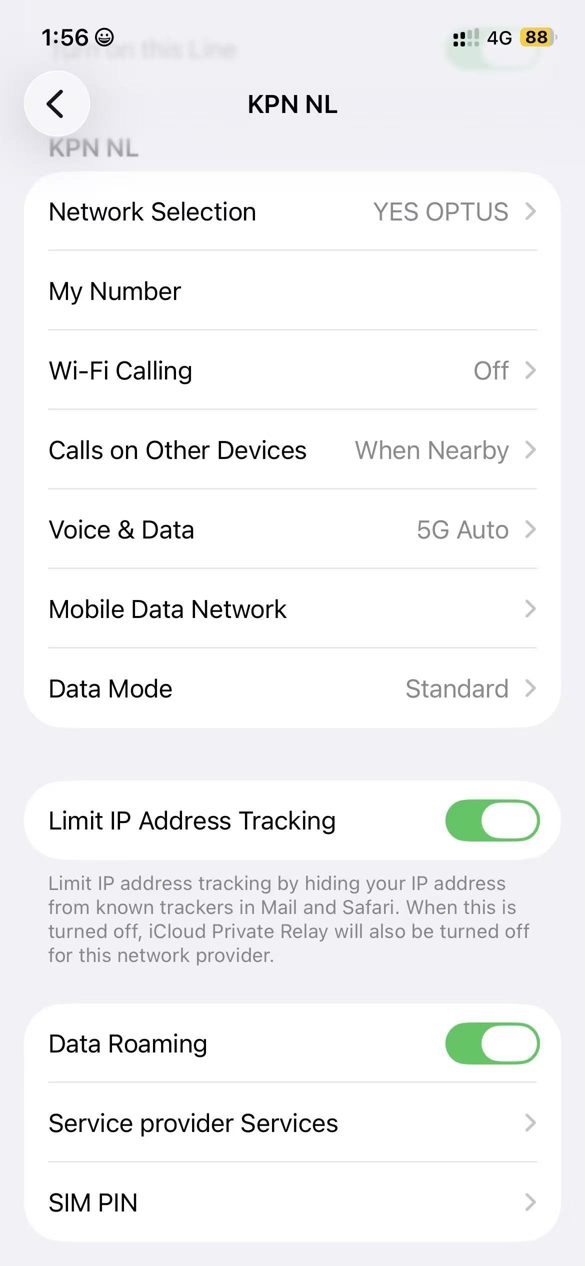
Switch roaming off on your original SIM. If you ever enabled international roaming on your original line, turn its Data Roaming off, so your data cannot accidentally run through the wrong card and trigger roaming charges. RoamMelb eSIMs are prepaid, so there is no surprise bill.
Step 7: Check you are connected
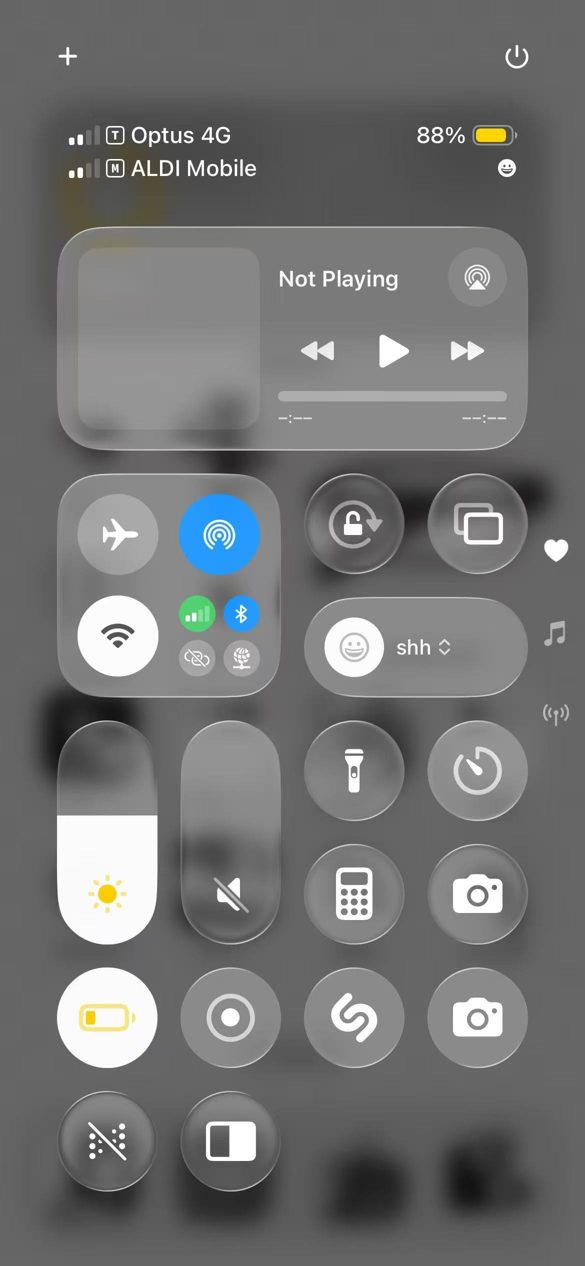
Swipe down from the top-right corner to open Control Centre. If the network shows Optus followed by 4G or 5G, you are connected. Right after registering it may show 3G or 4G for a few seconds before it finds a faster network.
Quick checklist
- Wi-Fi was stable during installation
- Plan type: Data Only
- Data Roaming is on for the RoamMelb eSIM
- Data Roaming is off for your original SIM
- Control Centre shows Optus 4G/5G
Browse eSIM plans in the RoamMelb shop, or read the FAQ first. Still stuck? Contact RoamMelb support and we will help.